
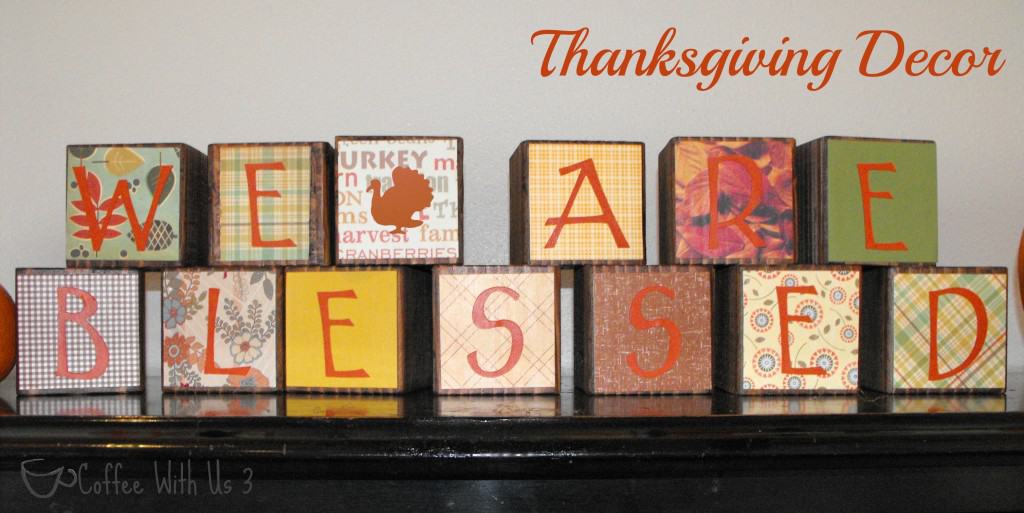
Blessed Thanksgiving Decor
As we head into the holidays with Thanksgiving and Christmas coming up, it seems that sometimes we (and especially the kids) can get very self-centered. We're thinking about what we have, to determine how thankful we are. Then we are thinking about what presents we're going to get. That's why I try to make an extra effort to show the kids what true thankfulness is about, and what Christmas is about. So I've been trying to make Thanksgiving decor that focuses on how blessed we are.
True thankfulness isn't about us, or about what we have. We are thankful because we are blessed. No matter how little or how much we have, we are blessed because we have a Father in Heaven who loves us and has redeemed us.
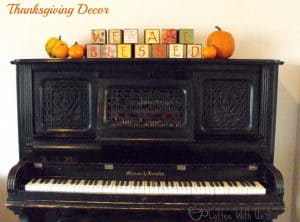
One of the things I made this year for Thanksgiving decor is this "We Are Blessed" block set. They were really easy and quick, so even if you aren't greatly crafty, you can make these.

What you will need:
One 4x4
A saw (I've been told that some lumber stores will cut the wood for you, so if you don't have a saw try calling your lumber store to see if they will do this)
Sandpaper block or a sander
Stain (I used Minwax 22250 ½ Pint Wood Finish Interior Wood Stain, Red Mahogany![]() -- For all of the blocks, I might have used ¼ of the ½ pint)
-- For all of the blocks, I might have used ¼ of the ½ pint)
An old rag and rubber gloves for staining
Mod Podge ![]() (I used matte, but if you prefer gloss do whatever you'd prefer)
(I used matte, but if you prefer gloss do whatever you'd prefer)
Scrapbook Paper (I used 13 different papers, but you could definitely do them all the same color to save money, and then you'd only need 2-3 sheets 12"x12"- two for the backgrounds and one for the letters)
Scissors or a paper trimmer
A foam paint brush
*If you have a Cricut or some other machine that can cut letters, that will make this much easier. If not, you can choose to either stencil letters or use sticker letters
Directions:
A 4x4 isn't actually 4" by 4". So if you want actual cube blocks, measure the size of your board (standard is 3 ½" by 3 ½").
Cut your board into 13 cubes (If you want to make reversible Merry Christmas blocks, you'll need 14 blocks). Give them a quick sanding. I did this with a block with sandpaper stapled to it, and it still only took me maybe 30 minutes. So it doesn't need to be an amazing sanding. Just sand the edges down a bit so they aren't sharp, and give each side a light sanding so that the stain will absorb better.
Put on the rubber gloves. Dip the rag into the stain and rub stain onto each block. A little goes a long way. Let them dry.
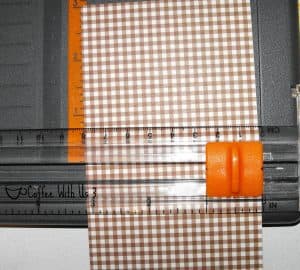
In the meantime, you can pick out your scrapbook pages and get the paper ready. I cut my paper into 3 ¼" squares, but I think 3" squares would look better, if I made another one.
 If you're using a Cricut or other cutting machine, cut out your letters. I did mine out of a 12" x 6" sheet of paper at 2 ½.
After the blocks are completely dry, you can decoupage them.
*Make sure you don't get overzealous with the Mod Podge, or it will make your paper curl slightly.
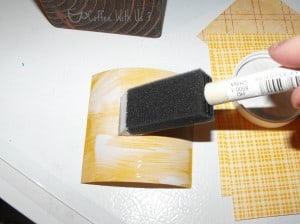
Using a foam brush, apply a thin layer of Mod Podge to one side of a wooden block. Apply another thin layer to the back of your piece of scrapbook paper. Place the scrapbook paper onto the wooden block and smooth out any air bubbles that might have formed behind the scrapbook paper. Let each block dry for about 5-10 minutes.
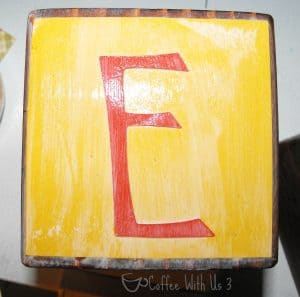
Once the blocks are dry, repeat the Mod Podge steps by applying a layer to the front of the scrapbook paper and to the back of the letter you're adhering. If you are using stickers, just stick the stickers on instead. While this part is still wet, apply a thin layer of Mod Podge over the top of the letter as well, to seal it.
Once the blocks are dry, you're ready to decorate. Put the blocks up however you want, but make sure you throw in some pumpkins! I just love pumpkins in the fall!
If you're looking for other ideas to help facilitate an attitude of gratitude during this season, check out these posts:


I also made these blocks reversible, so check out the Merry Christmas blocks as well!

Are there any ways you've found that have helped you and your family to focus on gratitude and blessings during the holidays? If so, I would love if you would share them with us and with our readers, so comment below! Thanks!
 Follow us on Pinterest at Coffee With Us 3
Check out our Link Parties.
Don't forget to pin!


Creating blessed Thanksgiving decor is a heartfelt way to celebrate gratitude and togetherness during the holiday season. By incorporating meaningful touches like thankful signs, scripture quotes, and family heirlooms, you can set a warm and inviting atmosphere for loved ones. Rustic centerpieces with autumnal flowers, candles, and natural elements like pumpkins and gourds can enhance the feeling of abundance and blessing. Handmade decorations that reflect your family's values and traditions make the space even more special. As you gather around the table, let your decor be a beautiful reminder of the blessings in your life and the joy of sharing them with those you cherish.
Hi Jamie! We were both featured at Salt Tree this week, boy am I in good company! I love these blocks, I haven't done much with modge podge yet but these are getting my creative juices flowing! I had to hop over and check out your blog and I am glad I did!
I can't wait to visit your blog! Get yourself some Mod Podge ordered and give it a try- I love working with it! Thanks for stopping by.
Those are super great! It's funny that you mention how easy they are, though, because of all the cutting, staining, sanding...maybe I'm just lazy! 😉 I do really like them, though--pinning right now!
Thanks for sharing your project with the Daily Blog Boost today!
~ Brooke ~
When I read your comment, I had to giggle a little. You're right- they don't sound super easy when you put it that way! I guess what I meant was that they don't take a lot of artistic talent- anyone could make these. And they really are quite fast to make. I let the stain dry overnight, but other than that, I had these finished in probably an hour and a half.
This is so adorable! I love everything you guys do but this is a favorite. Visiting from the daily blog boost.
Thanks Sandra! They were so fun to make, and I love how festive they make my piano look!