
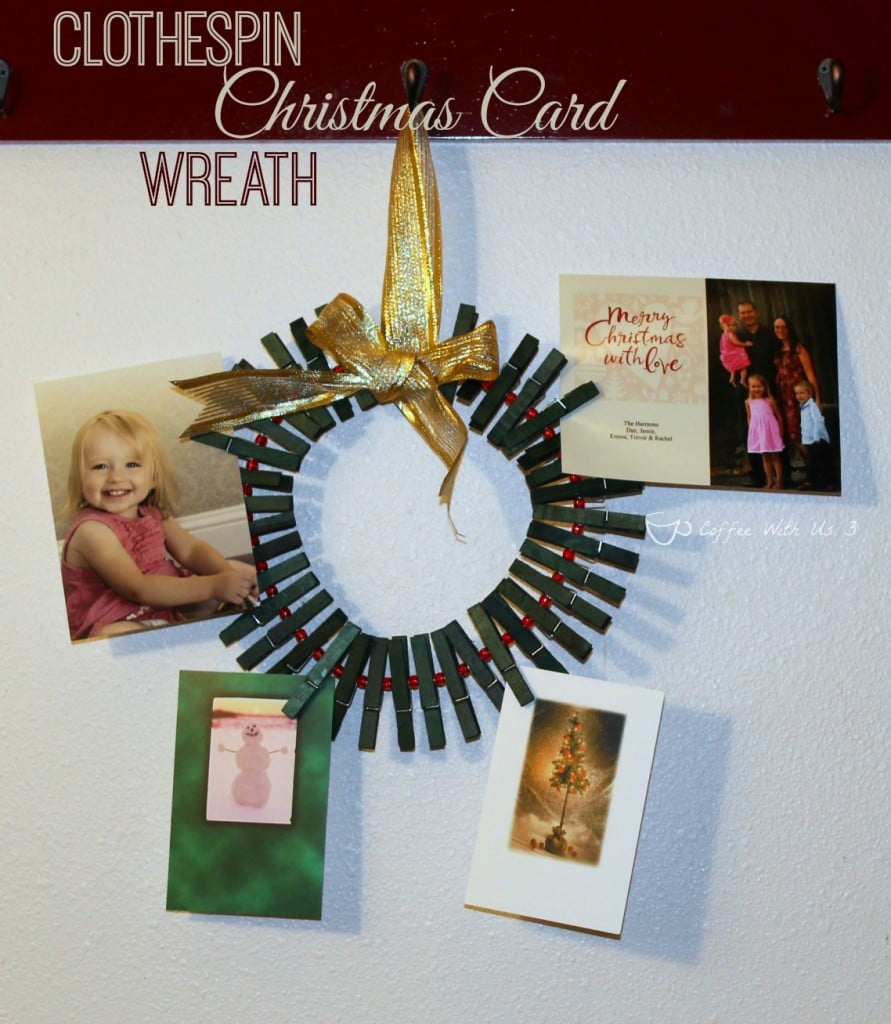
Clothespin Christmas Card Wreath
I first saw this adorable idea for a clothespin Christmas card wreath when I was looking for cute craft ideas for our local MOPS (Mothers of Preschoolers) group over the summer.
I pinned the image, figuring I'd look at the instructions as it got closer to Christmastime and our December craft. As is the case so often on Pinterest, I found that the link didn't go anywhere. So I started searching, since I really wanted to give credit where it was due. I finally found the original clothespin Christmas card wreath on Craftiness is Not Optional.
This craft worked out slightly differently for me, considering the fact that I was planning on prepping the craft for 20 women, not just to make one. Because of this, I did a few things differently, to save time.
Instead of using clothes hangers, I bought a spool of wire, which ended up being far cheaper than buying 20 hangers (with either, make sure that the wire is thin enough to fit through the clothespins- I found that most actual clothes hangers were too thick). I also chose to dye the clothespins rather than spray paint them. I love spray painting as much as anyone, but when it came to spray painting 720 clothespins in December, I just didn't think it sounded like a great time. I also bought the pony beads![]() in a large package from Amazon.
in a large package from Amazon.

So we'll start with dying the clothespins. If you're only doing a small batch, you can follow the directions from Rit Dye. I figured for a mass quantity, this was the way to go. I started by mixing one box of Rit dye![]() with 2 quarts of boiling water in a huge bowl in my sink (apparently you can actually do this in the sink, so if I ever do this again, I will dye them in the sink). I then added as many packages of clothespins as I could fit in the dye, while still being able to move them freely.
with 2 quarts of boiling water in a huge bowl in my sink (apparently you can actually do this in the sink, so if I ever do this again, I will dye them in the sink). I then added as many packages of clothespins as I could fit in the dye, while still being able to move them freely.
I stirred the clothespins around every few minutes, letting them dye for 10 minutes. Then I used tongs to pull handfuls of clothespins out at a time. I spread them out over paper towels on a cookie sheet (I didn't want to chance dying my counter top). After I pulled those out, I put in another batch.
After the second batch, the water was cooling off, so I added another box of dye and 2 more quarts of boiling water. Then I put in even more clothespins, since there was more water, and did the same thing over again a couple more times until all the clothespins were dyed. Then I let them dry well. I would recommend letting them dry overnight at least- several days would be better.
Each woman got 36 clothespins (that's how many came in a pack at our dollar store), pony beads, and a piece of wire about 34 inches long.
Bend the wire into a circle, and then start threading on one clothespin, one pony bead, etc. I started and ended with a clothespin.
The original instructions say to overlap the two ends of wire and then hot glue them together, but I couldn't get that to stay. So I overlapped the wires by about 1 ½ inches and used masking tape (or duct tape) to tape them together. It doesn't matter if it's not pretty- it will get covered by the ribbon.
I used hot glue to get the ribbon to stay in the right spot over the masking tape, and then tied a bow.

Do you get or send Christmas cards? If so, do you display the cards you receive?

Why not join us on Pinterest: Coffee With Us 3 or hangout with us on Facebook:
Check out our link parties.
Don't forget to pin!


that is BRILLIANT! I need a larger one so when I remake it, I'm totally dying my clothespins! awesome!
Thanks Jessica! It was such fun to make, and I really enjoyed learning to dye clothespins-- I see many dyed wood projects in my future!