
Make Your Own Bias Tape
![]()

I love making my own bias tape. I've found that it saves me money, since store-bought bias tape is pretty expensive.
But even more than the money saving is the fact that I can make bias tape that exactly matches my project, instead of choosing from the scant plain bias tapes offered. I can make fun bias tape that stands out on a plain project. Homemade bias tape is great, and it's really pretty easy.
A bias tape maker will make it faster, so if you're planning on making a lot of bias tape, then it's probably worth buying one, and here are a couple examples of how you can buy a very simple bias tape maker![]() , or if you're really going to be making lots of bias tape, there are more expensive options
, or if you're really going to be making lots of bias tape, there are more expensive options![]() .
.

But if you're just planning on making bias tape for the occasional project, you can easily get by with just a few tools. You'll need:
- Iron and ironing board
- Tape measure
- Scissors or rotary cutter
- Cutting mat
- Fabric maker
As with all projects that involve fabric, you'll want to wash, dry, and iron your fabric before starting.
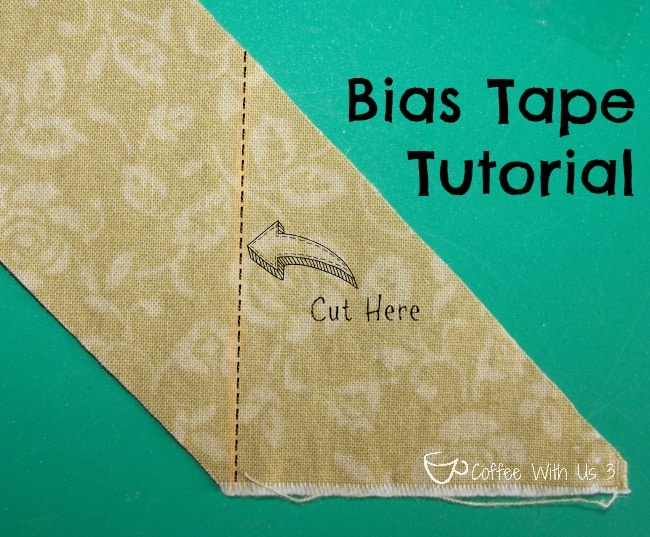
Lay your fabric out flat and fold the corner down to the bottom edge, so that you create a diagonal edge. This is called the bias edge. When fabric is cut on the bias, it stretches more than if it is cut horizontally or vertically.

Iron the bias edge and then cut along the line you just ironed. I prefer to use a rotary cutter for this, since it's just so much faster and you get a smoother edge. But if you don't have a rotary cutter, scissors will get the job done just fine.
Now you're going to measure in for the second cut on the fabric. If you're making single fold bias tape, you'll want to measure in twice the width of your final bias tape measurement. If you're making double fold bias tape, you'll want to measure four times the final measurement. For example, if you want to end up with ½" wide bias tape, you'll need to measure 1" for single fold and 2" for double fold.

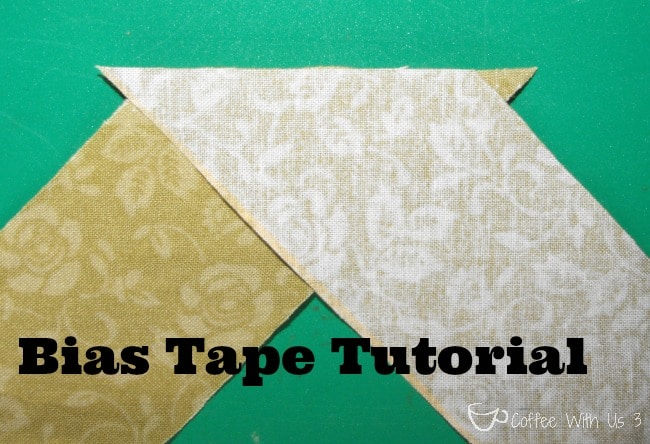
Cut along the line you've drawn, so you have a long strip. If you need really long bias tape (like if you're using it to edge a blanket), you can connect strips together. Make as many strips as you need to get the length you desire. Then you'll need to cut one end of the bias tape in order for it to line up right, like seen in the picture below.
After you cut that piece off, place the two pieces right sides together. It will look strange, but the pieces need to be staggered the amount of seam allowance. So if you are using a ¼" seam allowance, you'll want to stagger them by ¼". You can better see what I'm meaning in the picture below.
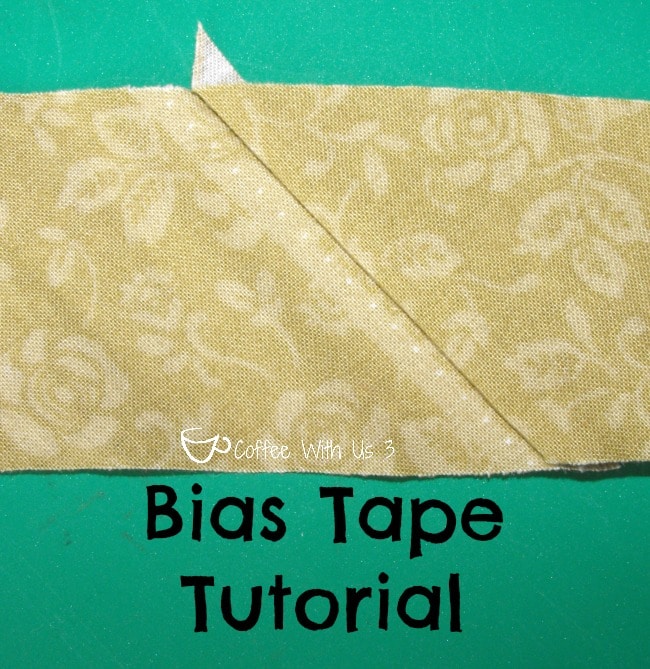
Now you will sew ¼" in from the edge, then turn and press, and it should end up looking like the next picture. There will be a little extra triangle of fabric on one side-- just cut that off.
You can connect as many strips at you want to, until you get the desired length of bias tape.
Now it's time to start ironing. Fold the bias tape in half and press. If you're making single fold bias tape, you're finished!

If you're making double fold bias tape, you need to open it and turn it over (right side down).
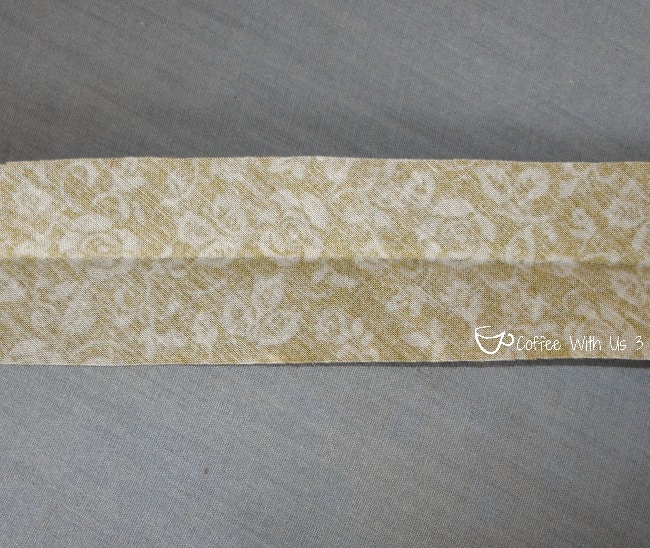
Fold in each edge until it is lined up with the center crease, and iron the outside edges.
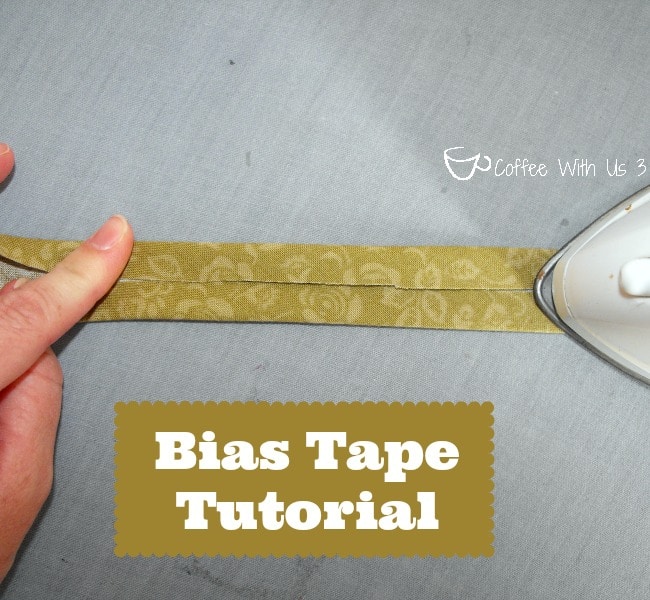
Continue down the length of your bias tape, folding in and ironing as you go.
When you're finished, fold it back in half along the first crease. I usually iron it again like this, but you don't have to.
To store, I like to cut notches in both ends of a piece of cardboard or card stock and wind the bias tape around it. This is basically how bias tape comes from the store.
What would you use homemade bias tape for?

Why not join us on Pinterest: Coffee With Us 3 or hangout with us on Facebook:
Check out our Link Parties.
Forgot to pin?


One Comment