
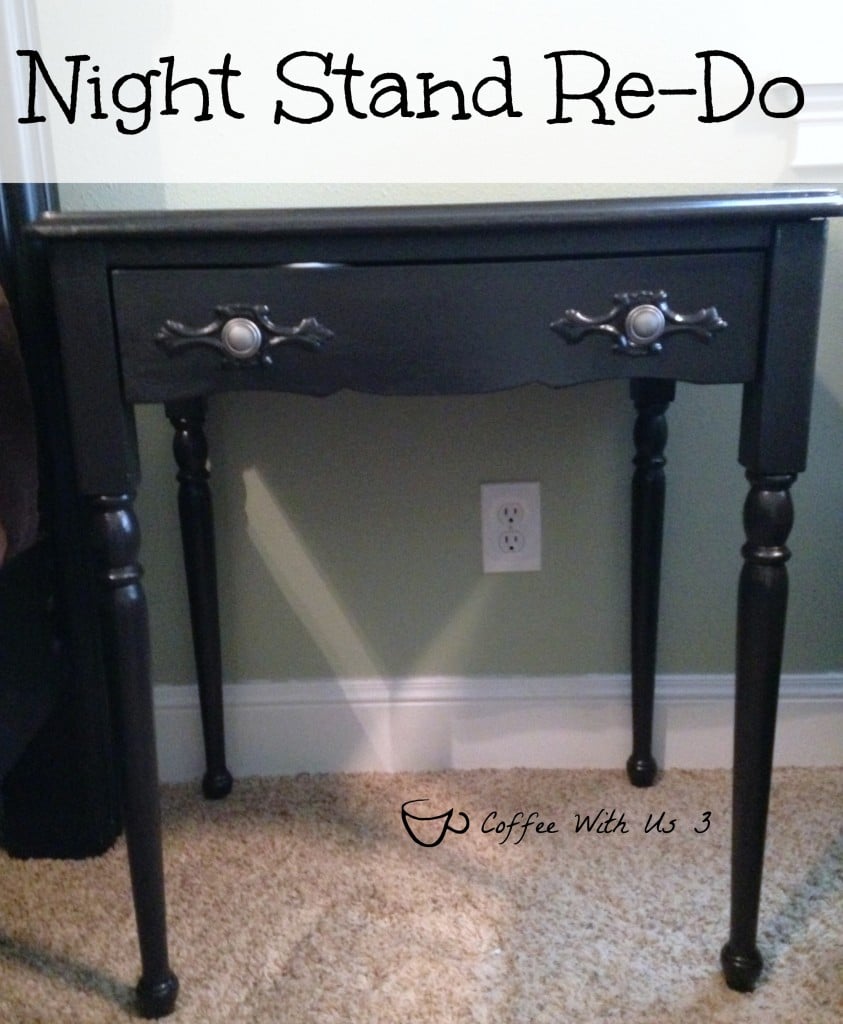
Night Stand Re-Do
Night Stand Re-D0 - Instead of buying a $300 nightstand that matched my bed frame, I did this instead!
When we bought our bed set, we didn't buy the matching night stands. We thought maybe we'll buy them later but we just kept putting it off, mostly because who wants to spend $300 dollars on a night stand and of course, we wanted two. And I just couldn't imagine shelling out $600 dollars for nightstands.
So when we moved into our new house, we begin looking for nightstands at yard sales, thrift stores, etc and then this one piece of furniture was offered to us by my mom. They were using it as a tv stand in the dining room but wanted to switch it out for something a bit smaller.
Night Stand Re-Do - How I did it:
- First I used liquid sandpaper to clean the furniture and remove the varnish.

- Then I painted the piece with Glidden Onyx Black Paint. I'm a big fan of Glidden paint and have used it with great success.

-I used a foam roller and a good quality brush to paint it.
- I finished it off with a sealer, because I have 4 kids and I wanted the paint to last.

- I also added some new hardware to the piece that was left over from another piece of furniture.
I was so pleased with how the re-do went. In total, I spent about $30 dollars instead of $300. And I'll be able to use the liquid sander, the paint, and the polyurethane again. Of course, if I had to buy the furniture it would have probably cost me another 10-30 dollars.
I have another nightstand that I'm going to paint with the same color for my side of the bed. I also have a lot of other fun DIY projects planned for this summer. Are you doing any fun projects this summer?

Why not join us on Pinterest: Coffee With Us 3 or hangout with us on Facebook:
Check out our link parties.
Don't forget to pin!


Looks great!