
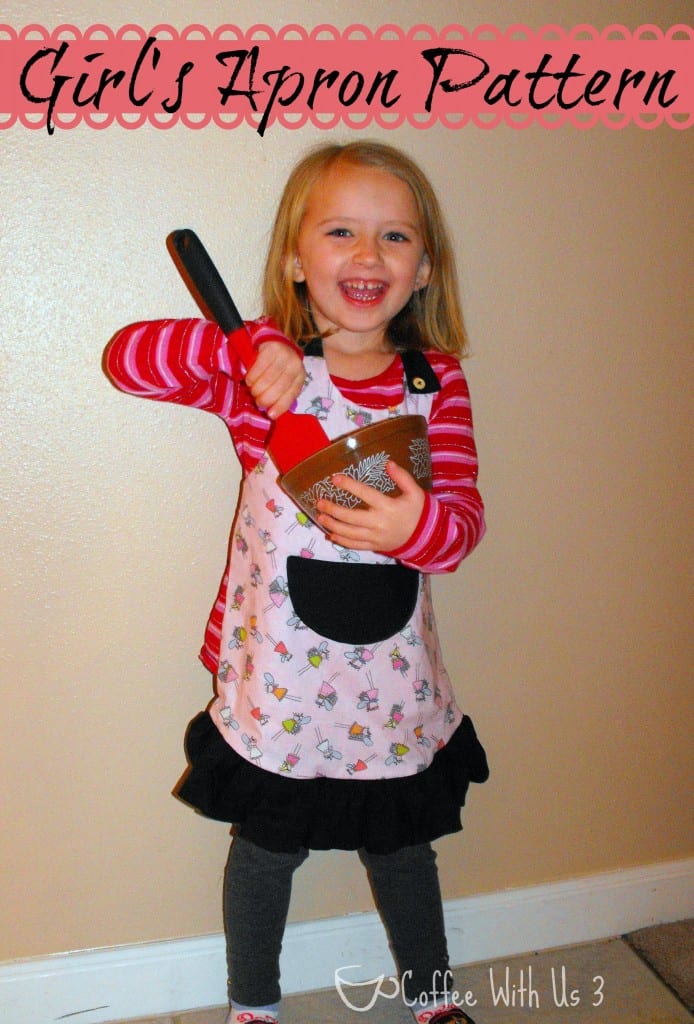
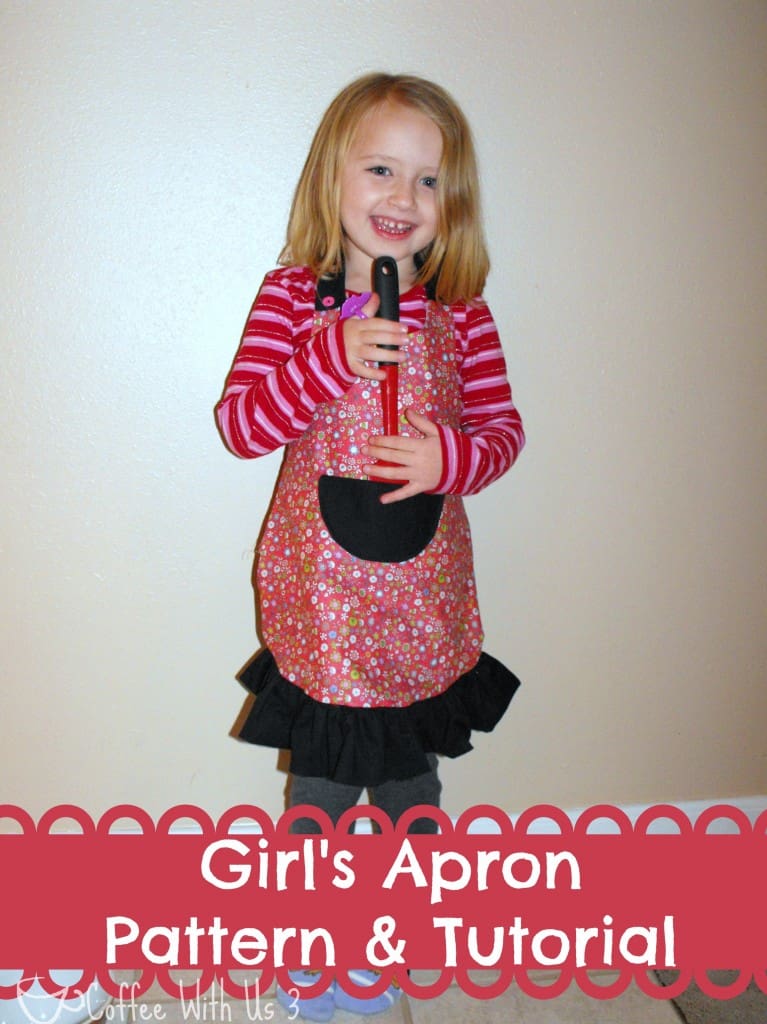
Girl's Apron Pattern and Tutorial
This Girl's Apron Pattern is easy to follow and would make a great gift for any little girl who loves to help!
If you stopped by the blog yesterday, you will have already learned that I'm making aprons for my kiddos for Christmas. Yesterday I shared a boy's apron pattern and tutorial. Today I'm sharing the girl's apron pattern. Both of these are reversible, simple patterns that can be finished in a couple hours- which makes them great Christmas presents!
What you'll need:
- ½ yard of contrast fabric
- ¼ yard of fabric in 2 colors/ patterns for the apron bodies
- Matching Thread
- 2 matching buttons
- General sewing supplies
- Pattern
Here are the 3 pattern pieces. You can download and print them, just make sure that they are printed at 100%. I've included a 1-inch square so that you can make sure they printed correctly.
This pattern should fit a child approximately 4-6 years old. It is shown in the pictures on my 4 year old.
https://www.coffeewithus3.com/wp-content/uploads/2013/12/Girls-Apron-Pattern-Top.pdf
https://www.coffeewithus3.com/wp-content/uploads/2013/12/Girls-Apron-Bottom.pdf
https://www.coffeewithus3.com/wp-content/uploads/2013/12/Girls-Apron-Pocket.pdf
Cut out the pattern pieces, and attach the Girl's Apron top and bottom pieces together so the sides line up the the 2 "V"s make an "X".
Using the pattern piece for the body of the apron, cut out one body piece from each of the main fabrics.
From the contrasting fabric, cut out the following strips:
For Straps: 4 strips of fabric 2" x 20"
For Neck strap: 2 strips of fabric 2" x 11" (before cutting this, measure on your child to make sure this will be a long enough neck strap)
For Ruffles: 2 strips of fabric 4" by approximately 40"
For Pockets: Cut 4 of the pocket pattern piece

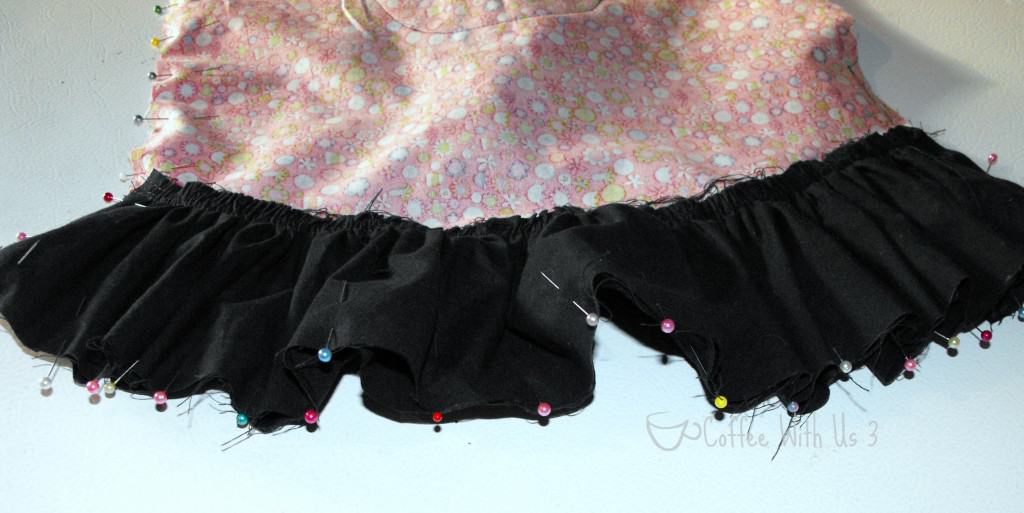
With the 4" x 40" strips, run 2 basting stitches down one long edge at approximately ¼" and ⅜". Gather the strip until it measures approximately 15 inches.
Put right sides together and pin the ruffle in place on the apron, as shown.

Repeat with the other ruffle and the other apron piece.
Sew the ruffles in place using a ½" seam allowance so your gathering stitches won't show. Press.
Putting right sides together, pin ties and neck straps. Sew around 3 edges, leaving one of the short edges open. Clip corners, turn inside out, and iron.
With right sides together, pin and sew around edges of pockets, leaving a 3-4" opening on the straight side for turning. Clip curves and corners. On the side that has the opening, iron both sides towards the center, so that the open area is straight with the parts that are sewn. Turn inside out and press. You'll need to sew the opening closed. I do this using a ladder stitch. Hold the 2 seams together. Insert the needle lengthwise through one of the seams, then come out from that seam and directly across into the other seam. See the picture for what I'm meaning. (I apologize that my drawing on it isn't very pretty- I was just trying to make it obvious what you should do).

Pin pockets to the centers of the apron pieces, and sew in place (making sure to only sew the curved part).

Pin neck strap and ties in place on the right side of one of the apron pieces, as shown. Pin the ends of the ties into the center of the apron so that you don't accidentally sew them.
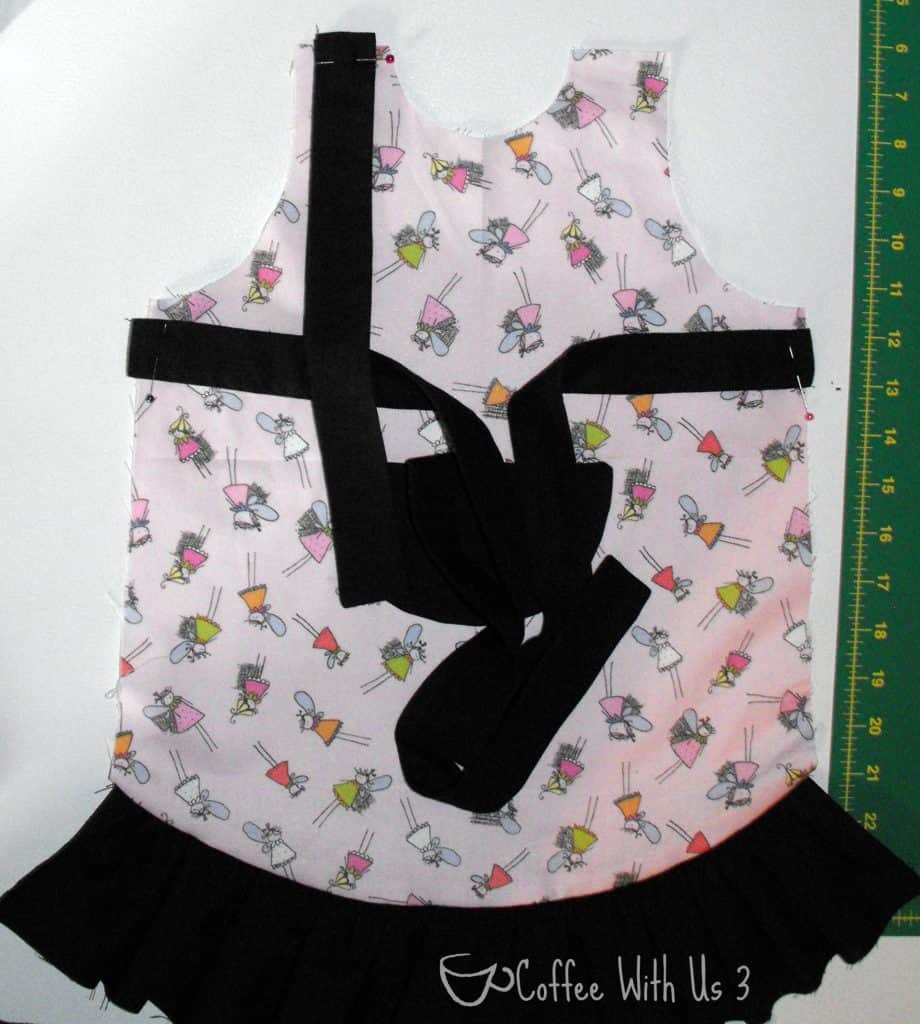
Lay the other apron piece face down (so right sides are together) and pin.
 Sew apron pieces together leaving an opening on one of the sides approximately 5 inches wide for turning. When you are sewing the ruffle part, make sure the bottom edges line up.
As you're sewing near the ties and neck strap, be careful to sew next to the sides of the ties and neck strap and not to accidentally sew into them. Clip corners and curves, turn and press. Sew the opening closed using the ladder stitch again.
Sew a buttonhole at the end of the neck strap. Attach one button to each side of the neck opening so that the neck strap can be buttoned on either side.

If you'd like to make the boy's apron, check it out here.

Do your kids help you bake or cook? If so, what are their favorite foods to make?
This post is part of our Christmas Crafts & Decor Series. Be sure to check out the rest and keep coming back this month for more crafts! Also you can find all our Christmas posts in ONE PLACE! Check out our Homemade Christmas page for all our Christmas goodies.

Why not join us on Pinterest: Coffee With Us 3 or hangout with us on Facebook:
Don't forget to pin!


Super cute! Pinned it 🙂
Thanks for pinning, Artsy Momma!
Thanks so much for pinning, Artsy Momma!
My daughter would love this! Your tutorial is very detailed. I'm sure this would make an easy afternoon project. Thanks for sharing via Family Fun Friday.
This was so much fun for me to make- mostly because I got to see how excited my daughter was about it! Thanks for coming by, Stephanie!
Too cute! My girls would love these!
Thanks, Cathy! My kids adore their aprons- they just love helping me bake.
I've had aprons on the brain too. Yours are so cute. I'm not going to be able to get to mine until after the new year. But that's ok. I'll get there. 🙂 Thanks for linking up to Gingerly Made's Show & Tell.
Ginger, thanks so much for visiting our blog! I'm sure the aprons will still be much appreciated whenever you get to them! 🙂
That is adorable! Thanks for sharing at Mom's Library.
Janine, thanks for hosing Mom's Library- we love linking up there!
Very cute aprons! If I'm brave enough, I will attempt to do this project with my girls. 🙂 Thanks for sharing the pattern. I can imagine that was A LOT of work.
Rachael, I hope you do try it- and I would love to see the results, so please let me know if you do! As far as sharing the pattern, some of my favorite sewing blogs share patterns, and it's been my goal to figure out how to do it. I was a bit intimidated but you know what? It wasn't actually that hard!
Too cute and love her smile! Thanks for sharing this at Talking Tuesday, we appreciate you stopping by.
Thanks for hosting and taking the time to stop by our blog!
Thank you for sharing this this morning at the Show Stopper Saturday link party, Jamie! I'm going to make all of my nieces an apron for Christmas. Yay...I'll be the best aunt ever! Pinning on a few of my boards... (=
I made aprons for all my nieces a couple years ago. It was so much fun! Thanks for pinning, and if you wouldn't mind sharing pics when you're done, I'd love to see!
How cute! Pinned to our craft board 🙂
Shauna @ The Best Blog Recipes
Shauna, thanks so much for pinning!
How cute! Look at her big smile! I'm pinning for the sake of my future grandchildren 🙂
Thanks! Miss Magoo just loves when I sew for her- in fact, she thinks I can sew her anything (which isn't true at all)! Thanks for pinning!
Those are so cute! I love how they turned out!
Thanks, I'm pretty happy with them too. Creating a pattern was a little bit daunting, but it ended up being fun!