
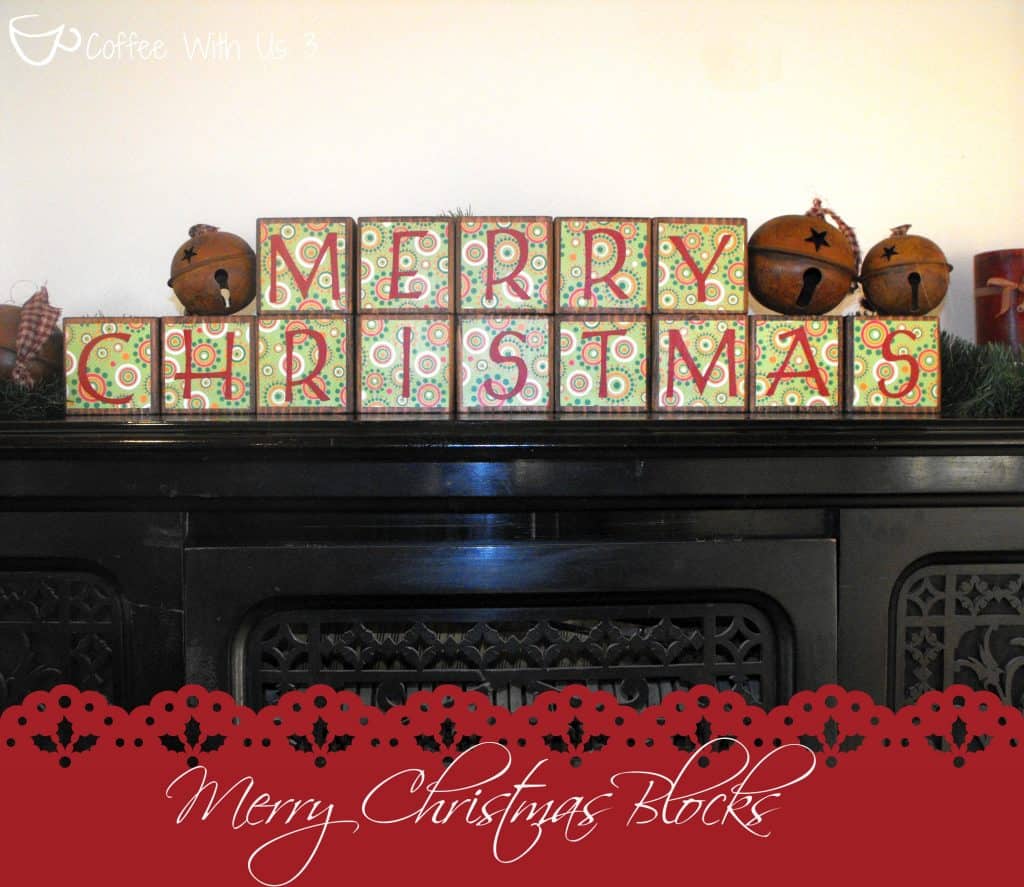
Merry Christmas Blocks
Want a fun way to spruce up your Christmas decor without breaking the bank? This Merry Christmas block tutorial is easy to follow and you'll have cute Christmas decor for super cheap!

Did you make the Thanksgiving "We are Blessed" blocks? If so, this is the tutorial to make them reversible, and it is basically the same tutorial, so if it seems familiar, it is!

If you didn't make the Blessed blocks, you can still make these Merry Christmas Blocks- they take very little talent, and you can have them done within an hour or so.
What you will need for Merry Christmas Blocks:
One 4×4 (5 feet long will be more than enough)
A saw (I've been told that some lumber stores will cut the wood for you, so if you don't have a saw try calling your lumber store to see if they will do this)
Sandpaper block or a sander
Stain (I used Minwax 22250 ½ Pint Wood Finish Interior Wood Stain, Red Mahogany![]() - For all of the blocks, I might have used ¼ of the ½ pint)
- For all of the blocks, I might have used ¼ of the ½ pint)
An old rag and rubber gloves for staining
Mod Podge ![]() (I used matte, but if you prefer gloss do whatever you'd prefer)
(I used matte, but if you prefer gloss do whatever you'd prefer)
Scrapbook Paper - a 12x12 printed sheet for your backgrounds, and a 12x12 solid sheet for your letters
Scissors or a paper trimmer
A foam paint brush
*If you have a Cricut or some other machine that can cut letters, that will make this much easier. If not, you can choose to either stencil letters or use sticker letters.
Directions:
1. A 4×4 isn't actually 4″ by 4″. So if you want actual cube blocks, measure the size of your board (standard is 3 ½″ by 3 ½″).
Cut your board into 14 cubes. Give them a quick sanding. I did this with a block with sandpaper stapled to it, and it still only took me maybe 30 minutes. So it doesn't need to be an amazing sanding. Just sand the edges down a bit so they aren't sharp, and give each side a light sanding so that the stain will absorb better. If you have a belt sander, this step would be even faster.
2. Put on the rubber gloves. Dip the rag into the stain and rub stain onto each block. A little goes a long way. Let them dry.

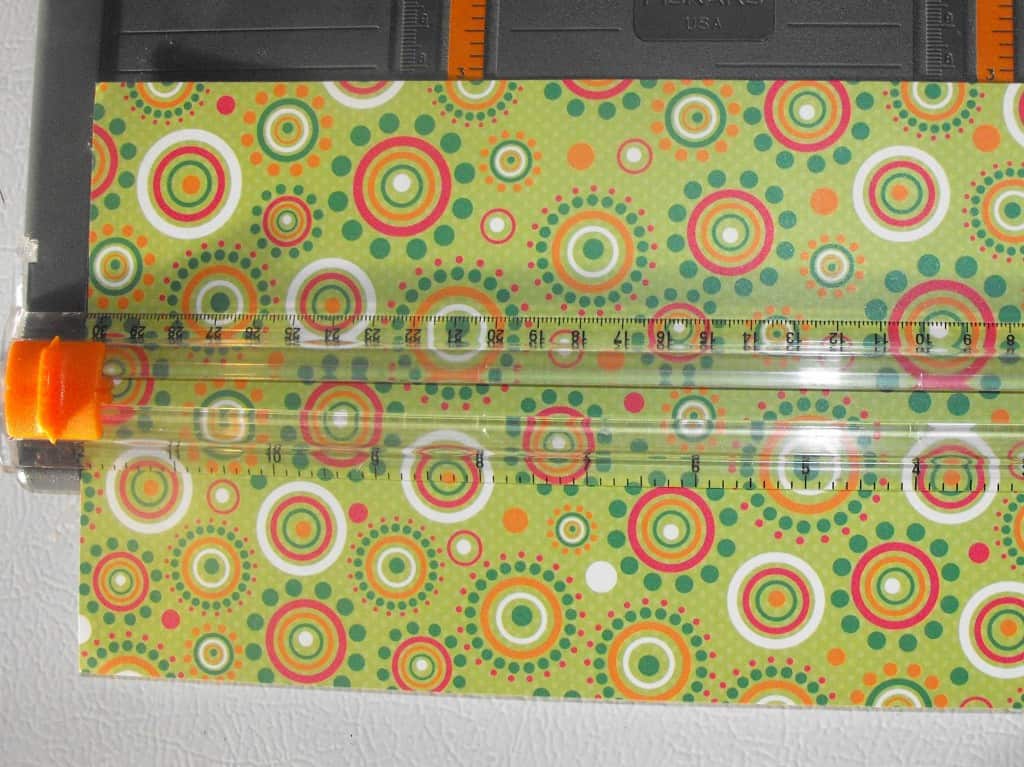
3. In the meantime, cut the printed scrapbook paper into 3" x 3" squares.
4. If you're using a Cricut or other cutting machine, cut out your letters. I did mine out of a 12″ x 6″ sheet of paper at 2 ½.
5. After the blocks are completely dry, you can decoupage them.
*Make sure you don't get overzealous with the Mod Podge, or it will make your paper curl slightly, or even tear.
6. Using a foam brush, apply a thin layer of Mod Podge to one side of a wooden block. Apply another thin layer to the back of your piece of scrapbook paper. Place the scrapbook paper onto the wooden block and smooth out any air bubbles that might have formed behind the scrapbook paper. Let each block dry for about 5 minutes- I just went through this step for each block, and by the time I got back to the first block it was plenty dry enough for the next step.


7. Once the blocks are dry, repeat the Mod Podge steps by applying a layer to the front of the scrapbook paper and to the back of the letter you're adhering. If you are using stickers, just stick the stickers on instead. While this part is still wet, apply a thin layer of Mod Podge over the top of the letter as well, to seal it. You may be able to see the brush strokes, but rest assured, Mod Podge dries clear.

8. Once the blocks are dry, you're ready to decorate. Put the blocks up however you want, add some garland, Christmas lights, or whatever you love!
This post is part of our Christmas Crafts & Decor Series. Be sure to check out the rest and keep coming back this month for more crafts! Also you can find all our Christmas posts in ONE PLACE! Check out our Homemade Christmas page for all our Christmas goodies.

Follow us on Pinterest: Coffee With Us 3
Check out our Link Parties.
Don't forget to pin!


30 Comments